St. Patrick's Day 4 Leaf Clover Necklace
St. Patrick's Day 4 Leaf Clover Necklace

You will need…
 Green Yarn (I used Red Heart Super Saver Solids in Spring Green)
- Pony Beads in the color of your choice (I used 32 beads for one necklace)
- Stitch Marker
- 3.25mm/ Size D crochet hook, or desired size hook
Stitches and Abbreviations used…
- Ch - chain
- Sl st - slip stitch
- Trb - treble crochet
- St - stitch
- Sts - stitches
- Rpt - repeat

Note - The length of this necklace is made for an adult, if you are making this for a child you will need to put less beads on your necklace.
As with any bead necklace, you can create the color pattern of your choice.

Leave a couple inches of yarn for beginning tail (You will use this to tie to the end tail).
Chain 4, pull the remaining loop out about 1-2 inches.

Pinch the loop, and insert it through one pony bead.

Insert the hook back into the loop, pull back into place, then complete a sl st.

Chain 2, pull the remaining loop out about 1-2 inches.
Pinch the loop, and insert it through one pony bead.
Insert the hook back into the loop, pull back into place, then complete a sl st.

Repeat until you have about 15 beads on your necklace.

--------------------------------------------------------------------------------------------------------------------
 Chain 3, place a stitch marker in the last ch. Chain 5, place a sl st in the first ch made of the ch 5.
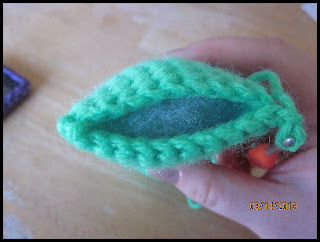
Chain 2, place 2 trb in the ring previously made, chain 2, sl st in the ring. Repeat until you have 4 leafs.

Chain 5, skip the first ch, sl st in the remaining 4 chs. Sl st in the same ring as the leaves.

Chain 3, add a pony bead, sl st.

Repeat from owl to owl, until you have 3 four leaf clovers, or the desired amount of clovers.

--------------------------------------------------------------------------------------------------------------------
Chain 2, repeat the beginning pattern of chains and beads.
Fasten off, leaving a tail for tying. Tie the beginning and end tails together. Cut off excess yarn.
--------------------------------------------------------------------------------------------------------------------

I hope you enjoyed this crochet pattern! Feel free to share your pictures on my Facebook page and Ravelry.
If you have any questions feel free to contact me at any time! Please do not claim this pattern as your own, I do not mind if you sell the finished product but do not sell or claim this pattern as your own.
MelissasCrochetPatterns@gmail.com
Ravelry ~ MelissaTrenado
Etsy Shop - MelissasPatterns
Facebook ~ Melissa’s Crochet Patterns
Instagram - melissascrochetpatterns

Comments
Post a Comment